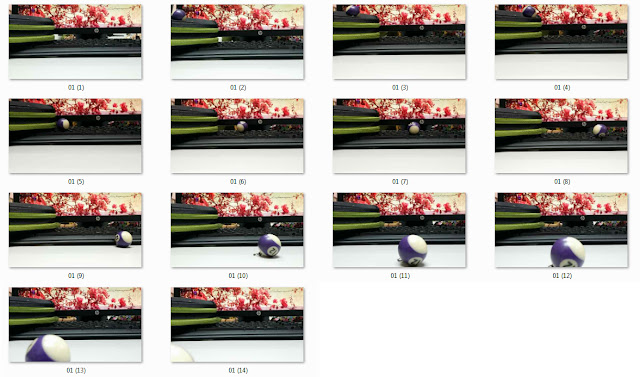
♠ 04062015 ♠ Stopmotion ♠
1. Take a few pictures in sequence.
2. Import them into Adobe After Effect and export it as a video.
[Duration : 2.0s] [Jpeg; Jpeg Sequence ✓]
Drag the images to the bottom.
[Time - Enable Time Remapping]
Drag the blue bar & the yellow dot to the end (RHS).
Drag the images to the bottom.
[Time - Enable Time Remapping]
Drag the blue bar & the yellow dot to the end (RHS).
[Export - Add to Render Queue - Render]
*Space=Start/Stop
*Transform can change the scale of the images.
*Space=Start/Stop
*Transform can change the scale of the images.
█ END RESULT █
①Squash & Stretch
②Anticipation
③Staging
④Straight Ahead & Pose-to-Pose
⑤Follow Through & Overlapping Action (Drag)
⑥Slow In & Slow Out
⑦Arcs
⑧Secondary Action
⑨Timing
⑩Exaggeration
⑪Solid Drawing
⑫Appeal
|||||||||| TASK : FLIPBOOK ANIMATION ||||||||||
*It's better to watch it with 2x speed.
♠ 18062015 ♠ Adobe Flash ♠
|||||||||| TASK : CIRCLE IN STRAIGHT LINE ||||||||||
1. Modify > Document > Change the dimension to (1920*1080) > Change the frame rate to (25).
2. Use Line Tool to create guideline (new layer).
3. At the 1st frame, create a circle.
4. Press F5 at 13st frame to select frame (1to13).
5. Press F6, then, use Free Transform Tool to move the circle to the end of the guideline.
6. Repeat steps for all of the frames. [F6 > Move circle]
*F5=Select Frame (Hold frames)
*F6=Insert Keyframe
!!! Onion Skin shows the actions of other frames.
!!! Free Transform Tool shows the center point of the circle
!!! Group the circle before moving it (Ctrl+G)
7. Now, create a new guideline with slow in & slow out.
8. Do the 1st half part, then copy it and flip it.
[Ctrl+C > Ctrl+Shift+V > Modify > Transform > Flip Horizontal]
9. Add a new layer for the circle, repeat Step 6. [13fps]
█ END RESULT █
|||||||||| TASK : CIRCLE IN LOOP ||||||||||
1. Create a circle and a line.
2. Adjust the center point and group it.
3. Duplicate them in position (slow in & slow out).
4. Repeat Step 9. [25fps]
5. Export them. [File > Export > Export Movie]
█ END RESULT █
♠ 25062015 ♠ Adobe Flash ♠
|||||||||| TASK : BOUNCING BALL IN STRAIGHT LINE ||||||||||
*Copy frames, paste frames & reverse frames.
█ END RESULT █
|||||||||| TASK : BOUNCING BALL IN CURVE LINE ||||||||||
█ END RESULT █
♠ 02072015 ♠ Adobe Flash ♠
|||||||||| TASK : SHAPE MORPHING (IN BETWEEN) ||||||||||
1. Polystar Tool > Properties (Tool Setting).
2. Create all the five shapes, then insert five keyframes.
3. At 1st frame, delete the other four shapes except the 1st one.
4. At 2nd frame, delete the other four shapes except the 2nd one.
(Other 3 frames follow the same steps.)
5. Ctrl+X, Ctrl+V for each frames in order to locate the shape at the center.
6. Press F7 to create blank keyframe.
7. Copy the 2nd shape to this frame. (Ctrl+Shift+G to ungroup the shape, left only the outline.)
8. Create the inbetween by changing the shape which is suitable for the center of transformation.
9. Then, follow by all the other frames.
10. Fill the shape with colours by using Paint Bucket Tool.
█ END RESULT █
♠ 09072015 ♠ Character Animation ♠
|||||||||| TASK : CHARACTER PAINTING ||||||||||
1. Sketch with Brush Tool.2. Add more details in another layer.
3. Use Pencil Tool to modify the sketch and group every different parts.
4. Color it by using Paint Bucket Tool.
♠ 1607~06082015 ♠ Short Story ♠
|||||||||| TASK : CHARACTER ||||||||||
|||||||||| TASK : STORYBOARD ||||||||||
♠ 2008~27082015 ♠ Short Story Animation♠
|||||||||| TITLE : DON'T BE SO CURIOUS ||||||||||
(This is Khai Yeat's idea.)
|||||||||| JOB DISTRIBUTION ||||||||||
┋Tang Khai Yeat ┋ Create character; Compile file; Do after effect
┋Kok Teng Earn ┋ Create monster; Modify details; Final checking
┋Yap Mein Teng ┋ Create background; Modify details; Do after effect
|||||||||| TASK : BACKGROUND ||||||||||
(Three person in a group and I'm in charge of the background.)
2. Duplicate more trees.
3. Paint with colours.
4. Final modification.
Shadow Part:
*F8 = to change it to symbol (button)
Click on properties, then change the style to Alpha (adjust the opacity)
*Shift+Center = Select outline
5. Separate the chest into different parts to make the animation later easier.
█ END RESULT █


No comments:
New comments are not allowed.